
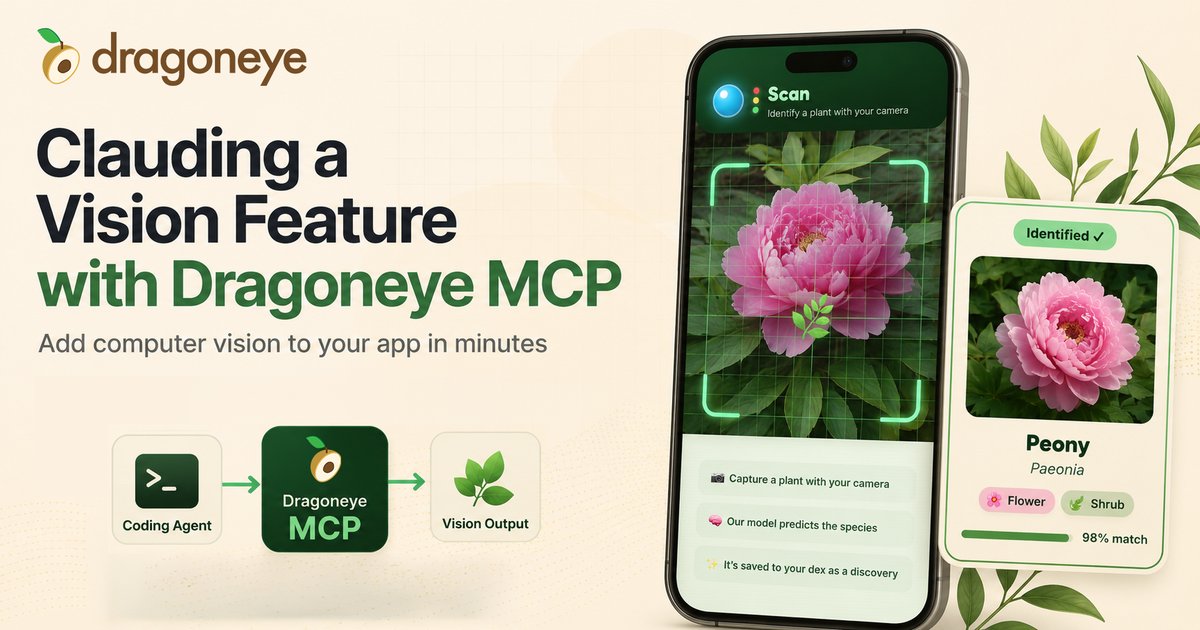
The Dragoneye MCP server gives your coding agent — Claude Code, Codex, or any other MCP-capable agent — the tools to build zero-shot object detection models for images and video, right in your coding session. That means your agent can build a vision-powered feature end to end, from creating the model, to wiring it into your app, all the way to building the complete feature around it.
Today I’ll show you how to use the MCP by building a plant-identification feature in Plantdex, a small toy plant-logging app I built, in about ten minutes. I’ll walk through the whole path: install the MCP, authenticate, prompt the agent to build a model, inspect the generated schema, and review the API integration before deploying. If you’d like to clone it and follow along, check out the repo here: GitHub
Contents
Meet Plantdex
I recently built Plantdex, a little app to keep track of the greenery I kept spotting around New York City.
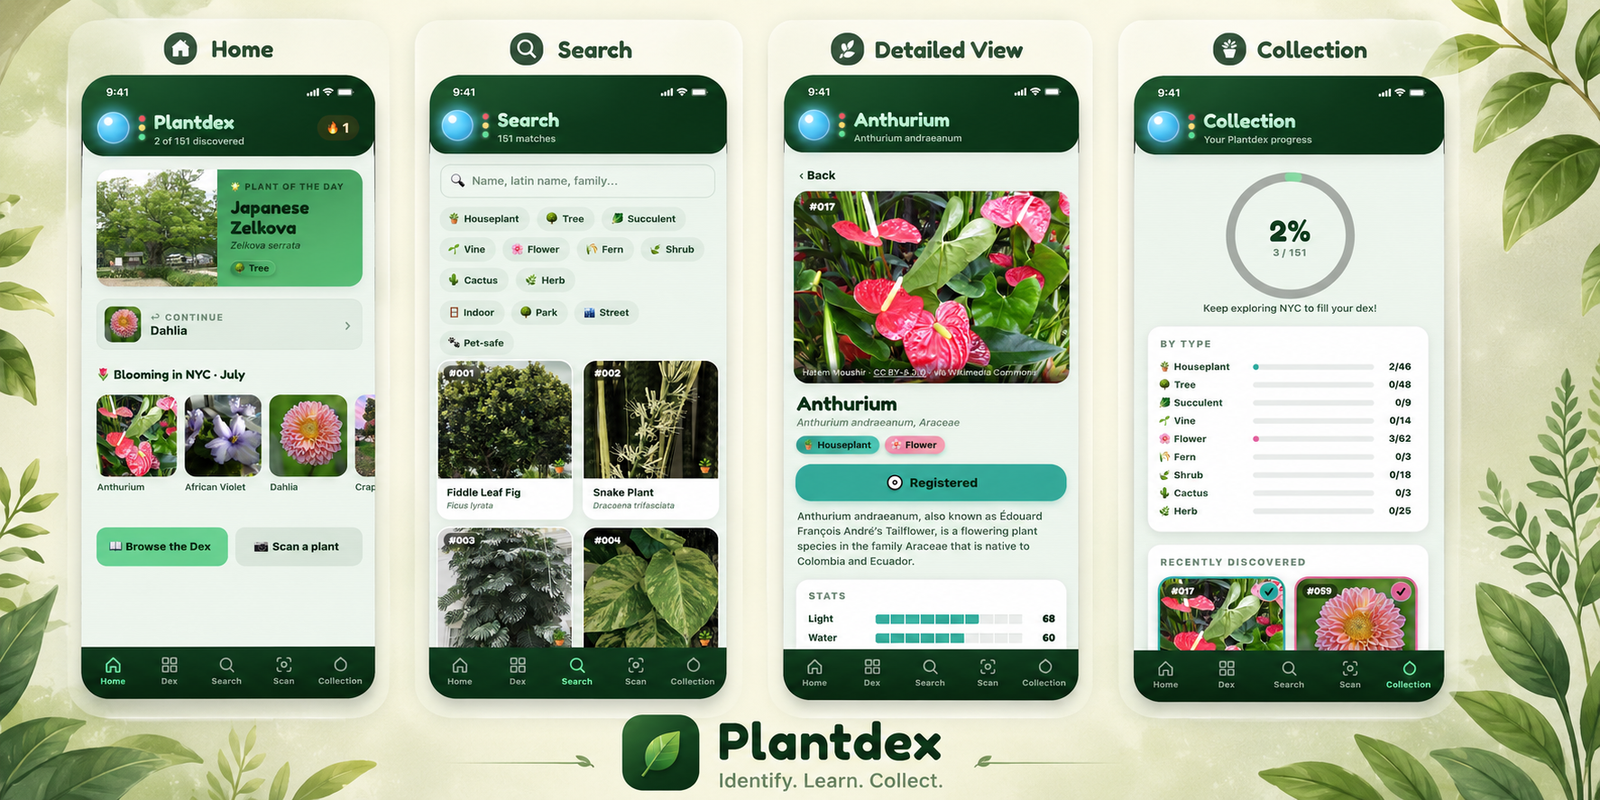
Plantdex is laid out like a Pokédex for plants. The Dex tab is a grid of every plant in the database; Search filters that grid by type and habitat; Collection is your progress dashboard — the plants you’ve registered so far; and Home surfaces a plant of the day and what’s blooming this month. To register a plant today, you open its detail page and tap Register in dex.
In its current state, registering a plant means you have to already know what it is. That’s a huge problem for non-botanists like me since I don’t (if I already knew it was a creeping phlox, I wouldn’t need the app at all!). So I want to add a Scan feature, which would allow me to take a photo of a plant and let the app identify and register it for me.
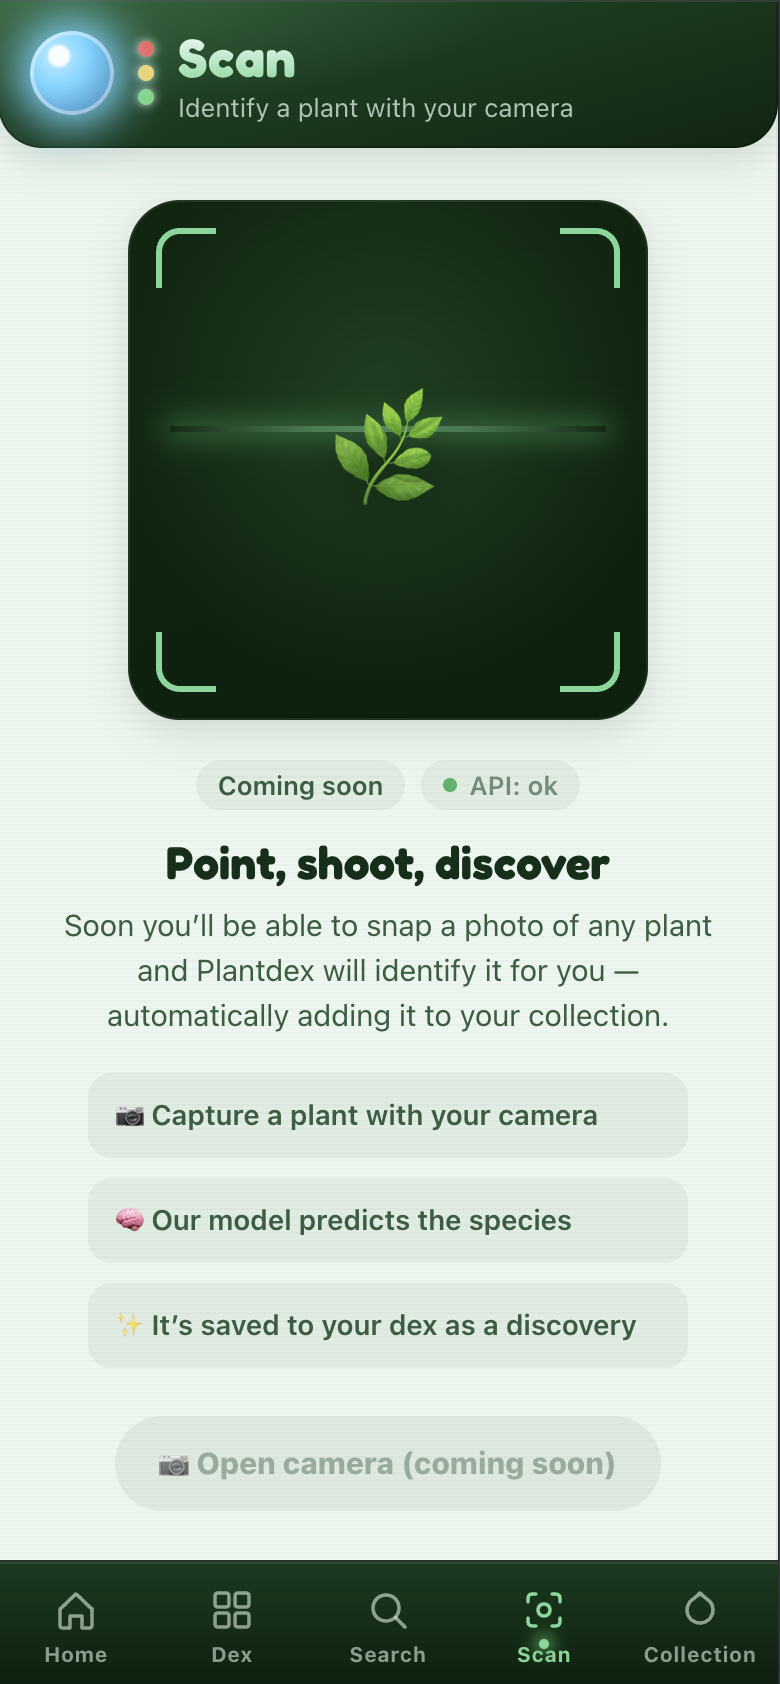
So far, all I’ve done is stub out a Scan screen with a camera UI and a button that POSTs to an /api/scan Pages Function that’s currently a no-op. That function logic and the model powering it are what I’ll build today.
The part that used to be a whole project
The screen, the fetch, the /api/scan function — that’s ordinary work an agent could always write for me. However, there were two problems:
First, building a model to tell a sunflower from a peony is hard. At minimum I’d have to gather and hand-label a pile of example photos, train it on a detection architecture, and stand up an endpoint.
Second, none of that happens easily inside the agent environment. So I’d have to go and manually run a little ML project, and then come back to wire in the result.
Dragoneye’s zero-shot models solve the first part, and the MCP solves the second. The agent describes the plants in plain language — sunflower, peony, creeping phlox — and tells Dragoneye to build a zero-shot model in about a minute. No dataset, no labeling needed. Then it figures out how to integrate it into the feature we want in the app. We don’t have to go off to do anything (except maybe have a coffee break)!
The build, step by step
Let’s now walk through step by step how this works. While this is following our Plantdex example, the steps work for any app you’re adding a vision feature to.
Step one: adding the Dragoneye MCP to my coding agent
The first thing to do is to add the Dragoneye MCP to our coding agent. How you add the MCP depends on your agent. I’m using Claude Code here, but Cursor, Codex, or any MCP-enabled agent works too.
Claude Code — one command in the terminal:
claude mcp add --transport http dragoneye https://nexus.api.dragoneye.ai/mcpCursor — add Dragoneye to ~/.cursor/mcp.json (or .cursor/mcp.json for a single workspace):
{
  "mcpServers": {
    "dragoneye": {
      "url": "https://nexus.api.dragoneye.ai/mcp"
    }
  }
}
Codex CLI — one command in the terminal:
codex mcp add dragoneye --url https://nexus.api.dragoneye.ai/mcpFor other coding agents, see the MCP setup guide.
Authentication for the tool is through OAuth, so the first time the agent calls a Dragoneye tool, it’ll prompt you to log in to Dragoneye and authorize permissions. It’s the same Dragoneye account you use for the Playground, so the model it builds shows up under your login automatically.
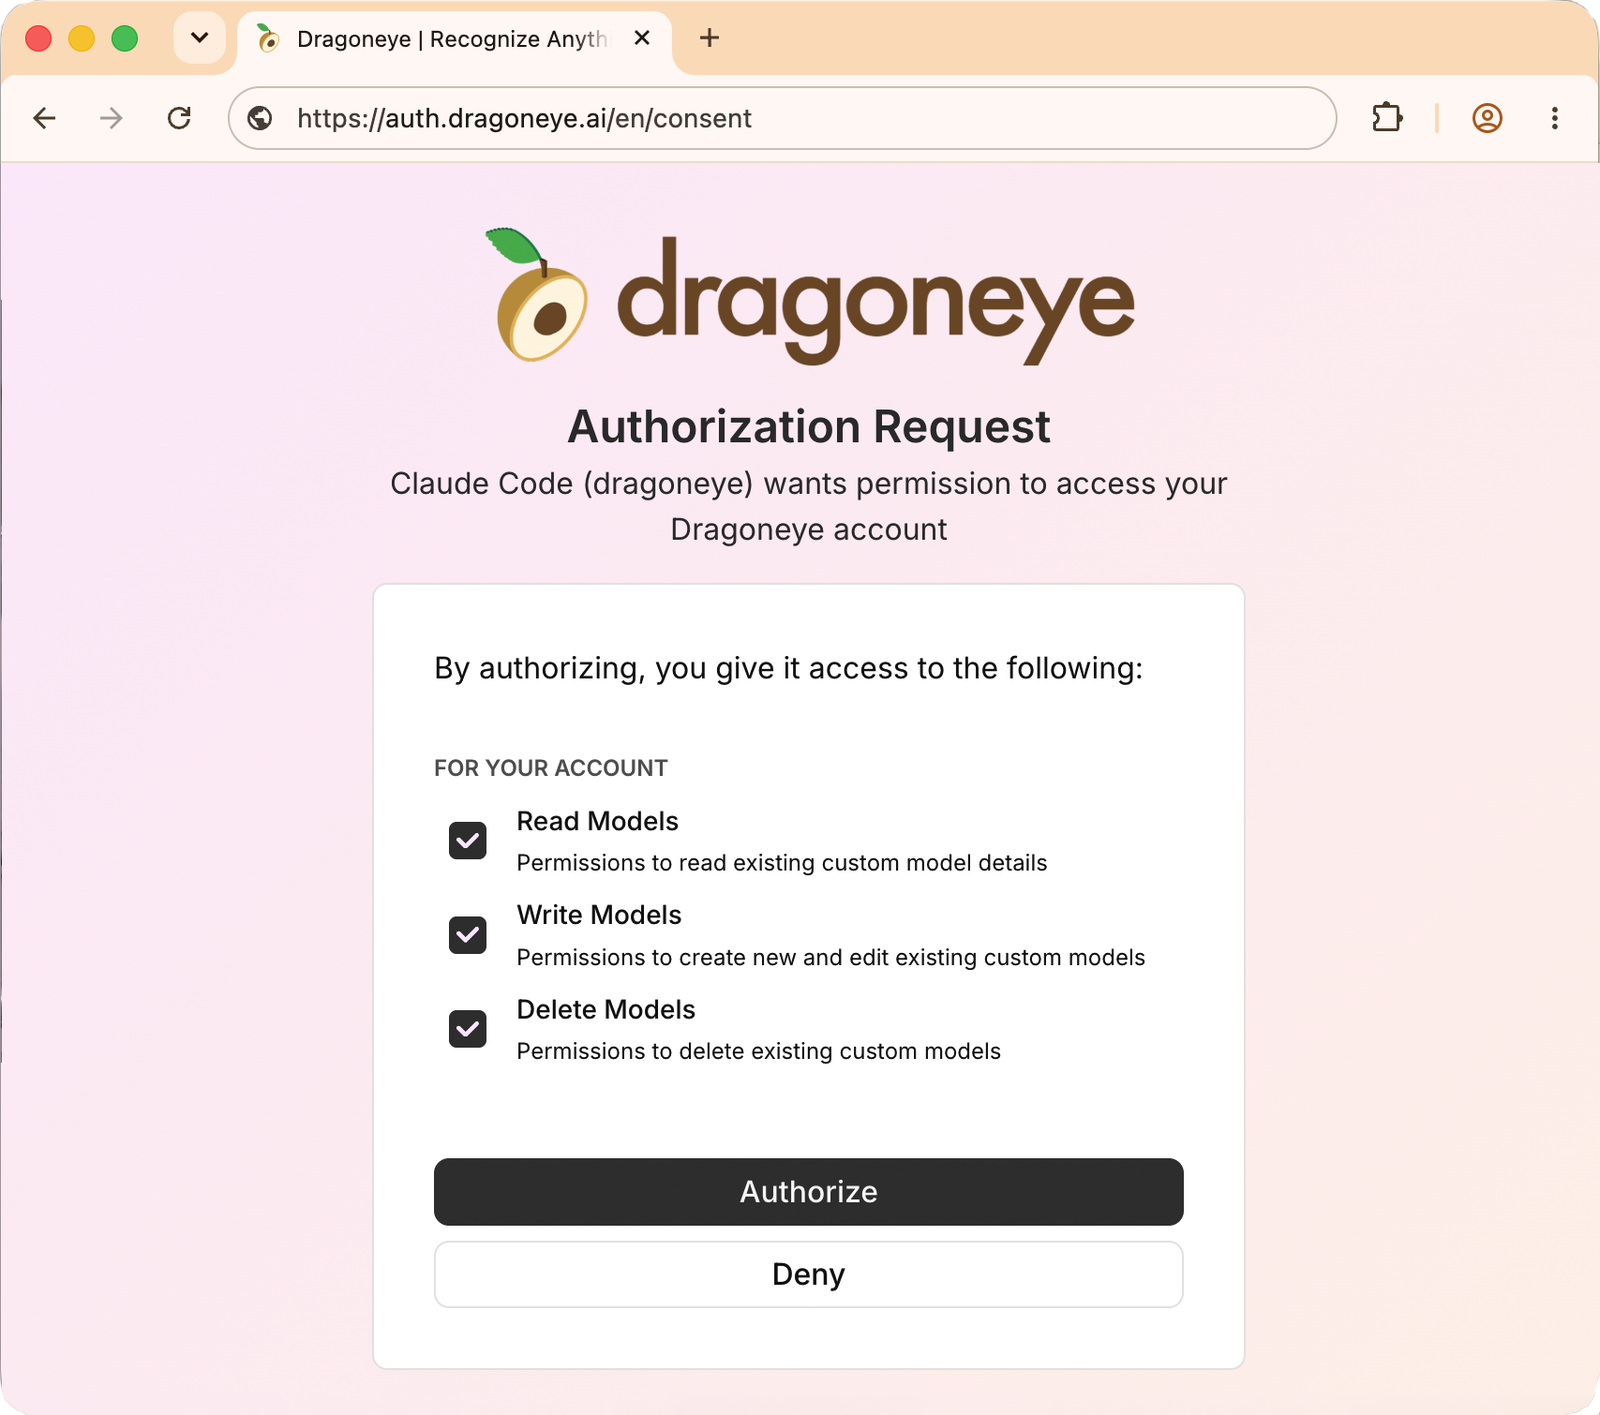
I should note that there are two credentials at play here. One is the OAuth credential for the MCP, and the second is the DRAGONEYE_API_KEY that your app will need to send prediction requests later.
Full details are in the MCP setup guide.
Step two: tell the agent what we want to build and let it rip
After authing the MCP, you’re pretty much set. You can just ask it to build the feature as you normally would, and it’ll know how to create the model and wire it in. One note: it works better if you explicitly ask it to use Dragoneye, so it reaches for the right tools. For the Plantdex app, I prompted:
We want to build out the plant scan feature we've stubbed here:
@plantdex/src/screens/Scan/Scan.tsx. Can you build a model using Dragoneye to
recognize the plants Plantdex knows about, and then use it to power the scanning feature?
If all goes well, the agent should be able to handle the rest on its own. But it’s always good to get an understanding of what steps it’s actually taking, so let’s take a look.
Behind the scenes
Behind the scenes, the agent runs a short sequence of MCP tool calls:
- Create the model — the agent generates a natural-language schema: a plain description of the categories and attributes it needs to recognize. In Plantdex, that’s a list of common plants you’d see around New York: sunflower, peony, creeping phlox, hydrangea, and so on.
- Wait for the build — the agent polls the build-status tool until the model is ready, which takes roughly a minute. In the meantime, it can work on the UI, server function, or type definitions around the feature.
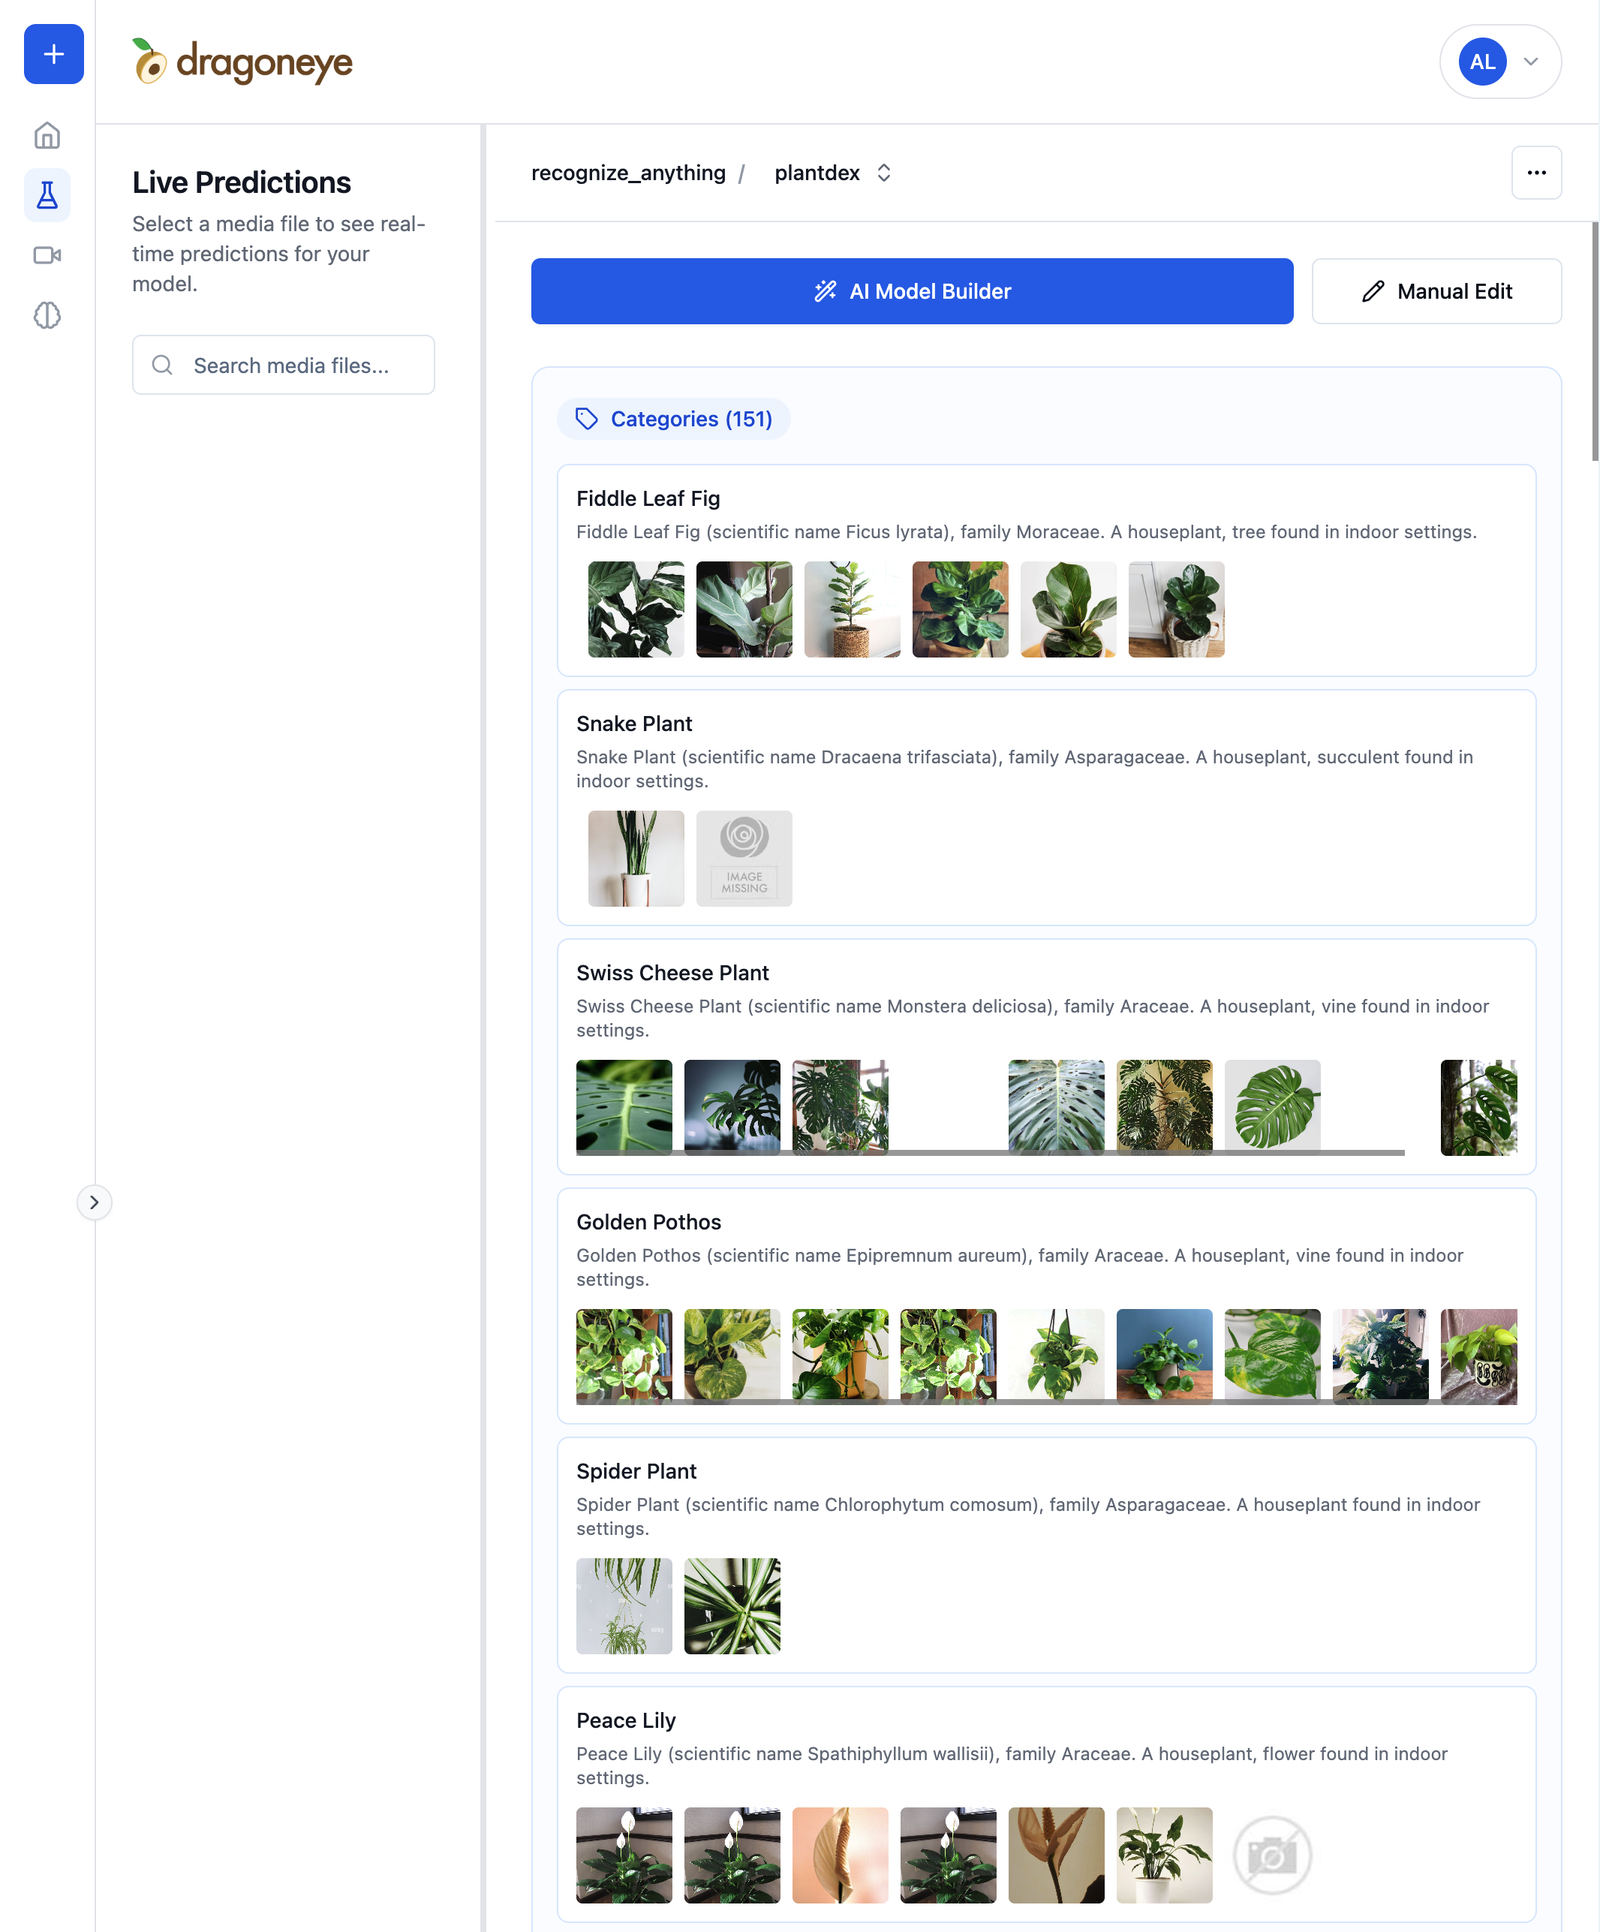
- Inspect the finished schema — the agent can inspect the built model to make sure it aligns with expectations before integrating it. This matters because names and categories become part of the API response your app consumes.
You can also look at the model schema yourself on the Dragoneye Playground. You should be able to see the model, like plantdex, show up under your account. If the agent doesn’t nail it on the first pass — misses a plant, splits a category oddly, or names something in a way your UI doesn’t expect — you can manually edit the model right there.
Step three: deploying and trying it on real plants
Once the agent is finished, we can see how it integrated it into the app. Once the model was ready, the agent filled in the empty /api/scan method and mapped the model’s output into Plantdex’s scan flow.
// Trimmed for the post — the real handler adds validation and error handling.

// Cloudflare Pages Function — POST /api/scan
import { Dragoneye } from "dragoneye-node";

export interface Env {
  DRAGONEYE_API_KEY: string;
}

const MODEL_NAME = "recognize_anything/plantdex";

export const onRequestPost: PagesFunction<Env> = async ({ request, env }) => {
  const form = await request.formData();
  const image = form.get("image") as File;

  const client = new Dragoneye({ apiKey: env.DRAGONEYE_API_KEY });

  const media = Dragoneye.Image.fromBlob(
    image,
    image.name || "scan.jpg",
    image.type || "image/jpeg",
  );

  const result = await client.classification.predictImage(media, MODEL_NAME);

  return Response.json(result);
};
A few things to point out:
- Claude was able to find and use the
dragoneye-nodeSDK to get predictions - We need to add our
DRAGONEYE_API_KEYto the environment variables in the Pages Function so the function can authenticate.
Also, because the agent inspected the schema, it knows the shape that comes back — a prediction response roughly like this:
{
  "object_predictions": [
    {
      "normalizedBbox": [0.31, 0.22, 0.68, 0.79],
      "predictions": [
        {
          "category": { "id": 12, "name": "sunflower", "score": 0.94 },
          "attributes": [
            // ... attributes trimmed for the post
          ]
        }
        // ... lower-confidence guesses trimmed
      ]
    }
    // ... other detected objects trimmed
  ]
}
With the app side wired up, we were ready to push the whole app to Pages, and could confirm it was working correctly. End to end it was about fifteen minutes — the ten-minute build, plus a few more to deploy and test it.
In the wild, it worked well on a lot of the flowers we tried in Riverside Park in New York City. It nailed a Virginia Bluebell that did not look like what I thought a Virginia Bluebell looks like. And it correctly called a peony that I would not have guessed to be a peony (I don’t know what peonies look like).
It also stumbled on some. A flower came back with a 52% match to “Common Sunflower”, only for us to later find out it was actually Heliopsis helianthoides (AKA False sunflower), which wasn’t in the Plantdex database and thus not in the model schema. It also struggled with a more zoomed-out photo, probably because of the other plants nearby.
That’s okay though, since we can go back and iterate on both the schema to include more species and the post-processing of detections to ensure that we pick the most prominent bounding box as the result.
Summary
And that’s about it: a stubbed UI and an empty Pages Function, turned into a working plant-scanning feature. And it’s a solid base to keep iterating on with Claude Code — adding more plants, pulling in structured attributes like flowering stage, or changing how a result maps onto the card. The model and the app code keep evolving together through the agent.
If you want to build one yourself: follow the MCP setup guide to wire the server into your agent, and get cracking!
And please let us know how it goes — @dragoneyeAI or contact us here. Happy building.